INSTALL CHECKLIST
TOOLS REQUIRED
- FLAT HEAD SCREW DRIVER
- SOFT FACE MALLET
- 10MM WRENCH
- 14MM WRENCH
- 23/64 DRILL BIT
- 27/64 DRILL BIT
- 4MM HEX KEY
- 5MM HEX KEY
- M6 MM RIVET NUT TOOL
HARDWARE INFO
READ BEFORE INSTALL
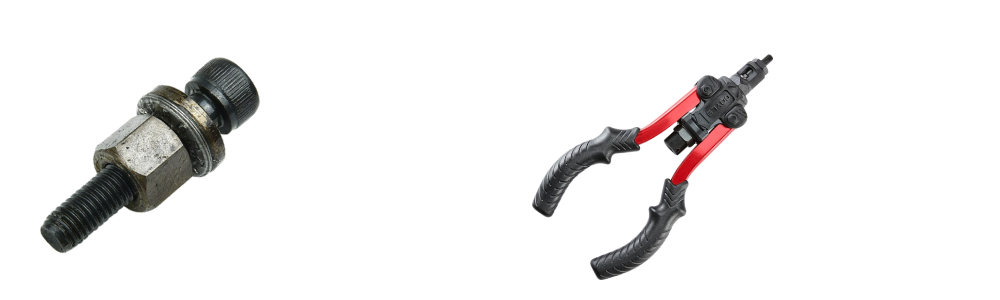
Let’s get this out of the way first! Your Adjustable Console System uses Rivet Nuts & Jack Nuts for installation, this hardware will require the use of a Rivet Nut Tool. Whether you purchased our Manual RivNut Tool (shown below), or if you have a dedicated Rivet Nut Setter Tool which is recommended for best results, be sure to verify and use the drill bit sizes listed below to install the hardware.
| RIVET NUTS | JACK NUTS |
| Console Molle Panlel: 23/64 DRILL BIT | Console Arms: 27/64 DRILL BIT |
-LjO68W5G.png)
-ePBaA7wN.png)
| M6 MANUAL RIVNUT TOOL | M6 RIVET NUT SETTER |
| Available from TRAIL ICON | Available in many hardware stores |
-i6W7jHhW.png)
HOW IT WORKS
Both types of hardware have the same function in crushing down from the backside surface of the desired mounting location creating a crimped hardware fixture in the panel.
Thread a Jack Nut or Rivet Nut on the RivNut tool and push into the drilled hole on the console, if using the
TRAIL ICON RivNut tool, use a 5mm Hex key Tool, or you can use a the drill mounted 5mm hex bit.
Be sure to keep the Jack Nut and tool pressed against the console while tightening the Jack Nuts, tighten the nut until it has a solid resistance, be sure not to over tighten them. Repeat on all 4 hole locations.
FOR ILLUSTRATION PURPOSES ONLY.
TOP DOWN EXAMPLE OF HOW THE JACK NUTS AND TOOL WORKS.
-HvN88wko.png)
PREP FOR INSTALL
Lower the center console to the down position and pull the cotter pins from either side of the hinge on the back of the console and pull the pins. *The pins will NOT be used with your New Console Kit, set aside for later use to return back to factory.
Remove the factory center seat /console upper latch, use a flat head screwdriver to pry the bracket open to slide the latch out. *This will NOT be used with your New Console Kit, set aside for later use to return back to factory.
Remove the rubber bushing pads on either side of the latch brackets *These can be used later with your New Console Kit.
ALL MODELS: Bend both latch bracket tabs to the flat position in the knockout location (illustration below)
-9Vq2byRc.png)
NOTE: For Single Cab and Max Cab Back Seat: For best results it is recommended to remove the carpet from the back wall before you bend the lower factory brackets. The carpet will sit on top of the lower brackets after they are bent back. Leave the carpet out for future steps.
ALL MODELS: Bend the 4 lower Bracket Tabs with the outer tabs toward the doors and the 2 inner tabs together in the center to allow clearance for the Molle Panel. It is recommended to use a a soft face mallet.
*The tabs will NOT used with your New Console Kit, but can be repositioned for later use to return back to factory.
-8EcaFRe6.png)
--BVxBCCP.png)
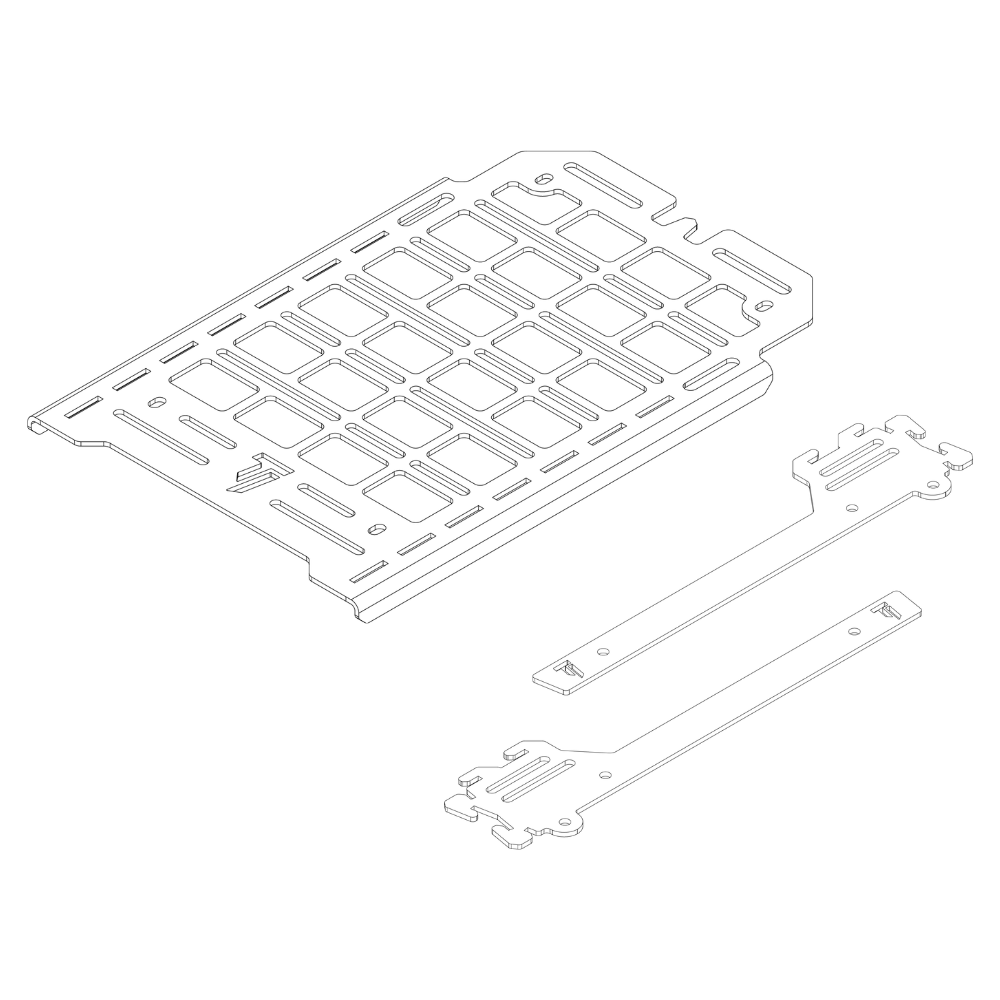
Step 1 - MOLLE PANEL
1. Lower the center console to the down position and pull the cotter pins from either side of the hinge on the back of the console and pull the pins. *The pins will NOT be used with your New Console Kit, set aside for later use to return back to factory.
2. Remove the factory center seat /console upper latch, use a flat head screwdriver to pry the bracket open to slide the latch out. *This will NOT be used with your New Console Kit, set aside for later use to return back to factory.
3. Remove the rubber bushing pads on either side of the latch brackets *These can be used later with your New Console Kit.
ALL MODELS: Bend both latch bracket tabs to the flat position in the knockout location (illustration below)